Showing posts with label distress. Show all posts

Wednesday, 12 October 2011

Time to start making Christmas cards

Every year I think I better start early with my Christmas cards, you know in summer. Make 2-3 every week and by the time Christmas comes round you're sorted. But it never works like that does it?
I have only just started with my xmas cards and this is the first design for the year. I picked up these cute little wooden reindeer in John Lewis. The card design is very simple but I find the browny/kraft distress style works well.


I am entering these into the Stamptacular Sunday Challenge where the theme is "So distressing".

Friday, 19 August 2011

A slightly different challenge.....


I stumbled across this challenge by chance the other day and loved the idea. Basically the Design Team over at Eclectic Paperie have been challenged to use

- distress inks
- an egg carton
- a die

in their creations. And everyone is welcome to join in. Don't mind if I do.

I used some sequin waste to ink through with my distress inks and I cut a bunch of flowers from an egg carton, using a die. Then I inked the flowers with various distress inks. Voila, this fun and playful card is the result. Check out the challenge for yourself here - Eclectic Paperie Challenge.

Wednesday, 13 April 2011

Vintage Butterfly Mirror

As mentioned before I'm making a lot of stuff for a craft fair at the moment and this is another piece I'll be displaying there. I used an Ikea mirror as they are so cheap and everytime I head to Ikea I stock up on a few of these. I covered it with Tim Holtz Kraft Resist paper which then got white washed and distressed with some distress inks, especially round the edges. From another sheet of the same paper I cute some butterflies and sprayed them with perfect pearls mist and stuck them on with foam pads. Gold corners and letters stuck on and it's done. It's very easy but looks lovely and old and vintagy. I may have to flick through the paper pack again and see what other papers may work well for use with the mirrors. I'm entering this into the Simon says Stamp and Show Challenge where the theme is distressing!

Friday, 3 December 2010

Vintage Christmas Canvas.....


Inspiration for this frame came from a recent issue of one of the stampington publications. I just wanted to create a little frame with a vintage christmas feel and something with a bit of depth. So I used the back of a canvas and covered it with terra paste all over, when dry I painted it cream and then rubbed over some inka gold with my finger to bring out the texture.
The inside was lined with stripey paper and for a touch of colour I used a blue fabric for curtains and made little ties with ribbon. I played around with the frame a lot and re-arranged it a lot to see what looks good and what doesnt.


The bells were originally pink and I simply painted them with modern masters rust paint. If you havent tried yet, get some, its lots of fun making things rusty and old.
The presents are covered in music paper and dictionary paper and distressed with ink. Around the edge of the frame I used some old gold lace, very heavy stuff. I remember my parents used to use the same stuff for nutcrackers they used to make, so for me its associated with christmas already, I just had to add some. If you have a closer look at the frame there are many things to discover and I had fun putting it together.


Tuesday, 21 September 2010

My first ABC Challenge entry......


Every week I find myself browsing the many challenge blogs and making notes of them so on mondays I'm ready to get making and joining in the fun challenges. Somehow I've never been able to come up with anything for the ABC challenge but this week D is for Distressing and that's right up my street. And to join in with my current mass-production of xmas cards and came up with this little card on the left.
The card is also joining in on the Stampman Challenge where the current theme is Distress.
I had them little reindeer for ages, my sister sent them to me. I only had 2 left though, so now she's on a mission to find some more, they are really nice and fluffy soft. Let's hope she finds some more.
Also, I have noticed that currogated kraft card is a little tricky to get hold of. I bought some on ebay before but none there now. And only found one online shop that sells it. Anyone know where I can get some?!
So anyway, as for the challenge entry, I distressed the red base card with ink and added a square of corrugated card, also distressed with ink and I really bent the edges and corners. The scallop circle are also coloured with distress ink. There you go. Another xmas card added to the pile.

Friday, 17 September 2010

Rusty Challenge Time.....


It is time for some more challenges. I've been working on this frame all week, you know a few minutes here and there, I was very busy at work but managed to squeeze in some crafting before and after work. So I have made this to enter 3 challenges.... first of all The Stampman Challenge where the theme is 'Distress', the Alter it monthly challenge with a 'Rusty' theme and last but not least the 'Distress' Challenge at Sir Stampalot.
I've been wanting to use some of the rusty knobs/keyholes/keys I bought at a market in Spain so I thought I combine them with some faux rust grungeflowers. Not sure you can see the rusty flowers very well in thr picture but they are done with distress embossing powder and then inked with distress inks. Very nice effect. I then went a bit crazy at adding lots of little things like punched flowers from metal sheet that I coloured with alcohol inks. Plenty of dangly bits from chains. Rusty snaps, also from a flea market. Some memo pins filled with beads. Grungepaper leaves, a crackled birdie. I just wanted it to look all old and grungy and rusty. I used a lot of Wendy Vecchi stamps on this, they are just fab for adding a pattern to chipboard and backgrounds.
So there you go..... yet another frame to be put on my living room wall, when the living room is freshly painted that is, my OH is currently re-painting rooms bit by bit.
I better be off to work.... ta da.

Sunday, 20 June 2010

For my dad....


Since it's Father's Day (in the UK) today I thought I share this card for you that I made for my dad. even though it's not Father's Day at home (in Germany) I sent him a card anyway. I used an old photo of my dad as a boy with a little metal frame and filled it with glossy accents. I first filled it with crackle accents but when it had dried you couldnt see the picture at all anymore which was a shame, it was just so blurred. So I started again and used glossy accents this time. And of course I had to use the memo pins embellishments, I am loving them at the moment. So there you go, my dad's card.

Wednesday, 16 June 2010

Vintage wedding....


My entry for Card Patterns this week is a wedding card. I did enjoy the sketch this week. Sometimes there's sketches I just can't do anything with. They just don't work for me, but this one was nice. cream and white card inked with distress inks, some idea-ology foliage and a sentiment, done.

Thursday, 10 June 2010

Idea-ology storage box....

As mentioned before I've been working on some long needed idea-ology storage boxes. Well, I do store other things in it, like any old metal finding and bit but you get the idea.
I bought 2 of these boxes on ebay and they are perfect to alter.


I gave the outside a good coat or two of a neutral basecoat. I just use an acrylic paint from the art shop. Then I use a lot of crackle paint, again a neutral colour like old paper (not the one in the photo, sorry for any confusion). And then I got spritzing with glimmer mists.


Add some grungeboard elements, some idea-ology and done. To be fair it sounds much easier than it was, I spent hours doing the glimmer mist and getting it right and then deciding what to put on the lid, but I guess that's the creative process and it should be fun. So if you attempting something similar, take your time to get it right, sometimes it's better to leave something overnight and then come back to it in the morning.

And here it is with all my bits in it:


I did buy 2 boxes cause I knew one wouldnt be enough to organize everything, so I will be back with the other box soon to show you what I did to that one.
Anika xxx


Wednesday, 2 June 2010

Burgundy, ivory and black Grungeflower card.....


So, here is another challenge entry for the week. I got up extra early today to make it. I'm using the sketch from Card Patterns this week and also entering it into the burgundy, ivory and black challenge at Gingersnap. I love using my tattered florals die to make flowers, it's just so quick and easy, a bit of walnut stain distress ink added and it looks fab. I like this card but I think it could look so much better, can't quite put my finger on whats wrong with it. Maybe the sentiment needs to move. Any ideas guys?!

Tuesday, 1 June 2010

Things with wings.....

Hey everyone....
It's been a very busy day (and past week), I was away in Germany too see my family and I had a rummage around a flea market and brought back some bits... old fabric tape measures, snaps, keyholes... I have been playing with some of them already and the result will be posted later in the week.

For now let me show you what I came up with for Hels Sunday Stamper challenge.
I've had the birdcage die sitting in its box for a week now and finally had to get it out and play with it.
On someone's blog (can't remember where it was, sorry) I saw these layered flowers made from the tattered florals die and here I've used 4 flowers, all cut from Core'dinations whitewash cardstock in various pink colours. Just crumple it up, sand it a bit, cut flowers and there you go, instant embellishment.


I also had some red pearls lying around from my jewellery making attempt late last year (I decided to stick with card and ink!) and they work rather well on the birdcage I think.

Here is some of the snaps I bought a whole box of at the market, much cheaper than buying the idea-ology ones and they look the same. If you've been reading my previous post about the crackle paint frames, you'll see this is the pink frame I created back then. I've been using a lot of crackle paint recently, and I'm really into making these little frames. A trip to Ikea is overdue to stock up on frames!!!
I'm also hoping to do my first blog candy this week, so pop back for some goodies. It's all very exciting really! Read you soon!
Anika xxx

I totally forgot to mention that it is also being entered into the challenge on the Alter it monthly blog. Check it out if you havent yet. Some nice artwork for inspiration there. I hope this qualifies as something altered, I'm just never sure, but it's a frame I altered and decorated etc so surely it qualifies.

Friday, 21 May 2010

Distress crackle paint frames ..... my findings

I've been meaning to decorate some picture frames for ages. I've always loved frames and old photos and having been inspired by Hels over on Ink on my fingers and her crackled frames, I thought I got to give it a go. Let me tell you now, it wasn't easy!!! To cut a long story short, I spent a whole day painting and re-painting some frames (cheapy ikea and other wooden frames) and spraying endless amounts of glitter mists and perfect pearls only to end up with some hideous frames. So that's when I decided to paint over them with a thin layer of my base colour, in this case an umber acrylic paint. And immediately the frames looked so much better.

I tried to take the photo on the left in the sunshine so you can see the glimmery shine on it, but not sure you can tell too well.

This is the blue frame. Im not even sure how it ended up blue, I have no blue glimmer mists nor crackle paint nor anything blue. Must just be a mixture of all those layers of mists and paints and stuff!

It's my mum's birthday this weekend so I made her a little frame of fun. I'm very pleased with it. Again I have to give Hels some credit for inspiration that comes from her blog.


This is being entered into the Sir Stampalot Challenge as my second entry. The theme is Butterflies and Blossoms so I think it's perfect.


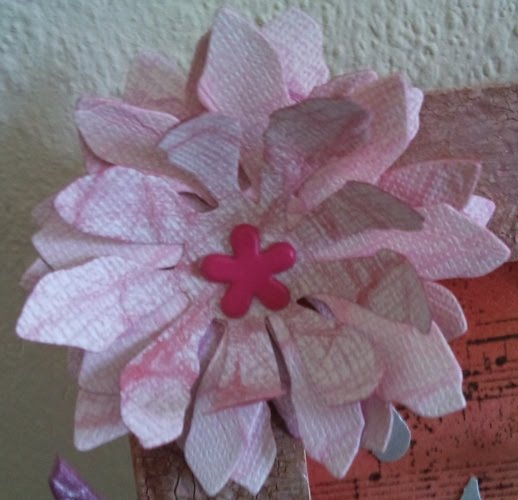
This is the pink frame. I know why it ended up pink. I used bronze crackle paint and it looked really patchy. So i painted the whole thing in the crackle paint and sprayed vast amounts of red glimmer mist on it. (I think less is more here!!!) It looked awful. A thin layer of the base paint over the top rescued it and then i got some white acrylic paint and dry brushed over the crackly patches which picked them up really nicely. some glimmer mist over the top and this time i dried it with a heatgun as i went along (this was advice from Hels again) and it soaked nicely into the crackles. Done.


As for this one, I eventually emailed Hels and she had some more tips for me (and she also said shes doing a tutorial on this at Gingersnap Creations, so check it out when it goes up) I painted on an umber base. Then I did an even layer of old paper crackle paint, a little thicker in places. A mixture of walnut stain ink with golden perfect pearls was sprayed over and dried with the heatgun. Then again I picked up the crackle patches with a bit of drybrushing. And there we go. Didnt take a whole day and now I know what I'm doing. So it was definitely worth the effort. And all I can say is, give it a go. Even if it doesn't look right the first time round, just keep at it!!!

Basic Grey Challenge: Punch it!


This is the first time I'm entering the Basic Grey Challenge but with such a great prize up for grabs I just had to join in and the theme is punch it, I love my border punches, even though I only have 3 of them so far. Should put a few more on the shopping list for next payday I reckon.

Unfortunately the picture doesnt show the brown card "clipboard" very well. I stamped it with the hero arts wood grain stamp and it looks really nice.

Tuesday, 20 April 2010

My scrapbook pages ....


I got into scrapbooking last year when I suddenly thought I could make a scrapbook for my Dad's 60th birthday. It was a bit of a mission as I had to secretly scan in all the old photos when I went home to see my family in November. The birthday being in January that didn't leave much time to make it but I managed 20 pages by the birthday and now I'm still catching up on scrappng all the other old pictures. Here is one of my Dad. And below you can find one of my mum when she was little and also my mum with me, my sister and brother. I love working with old black and white photos and giving the pages a grungy, vintage feel. Loads more old photos waiting to be scrapped so off I go to do some more crafting!


Thursday, 8 April 2010

Tim Holtz inspired.....

I've recently bought a whole lot of Tim Holtz products and currently working on my collection of distress inks, just loving the stuff. Still waiting for a giant order from the US but so far no sign of it. Anyway, so I've been getting a lot of my inspiration from the Stamper's Sampler Magazine and the Take Ten issues and came across some nice vintage photo corner/bird house tags and thought I had to give that a go and this is the result...